
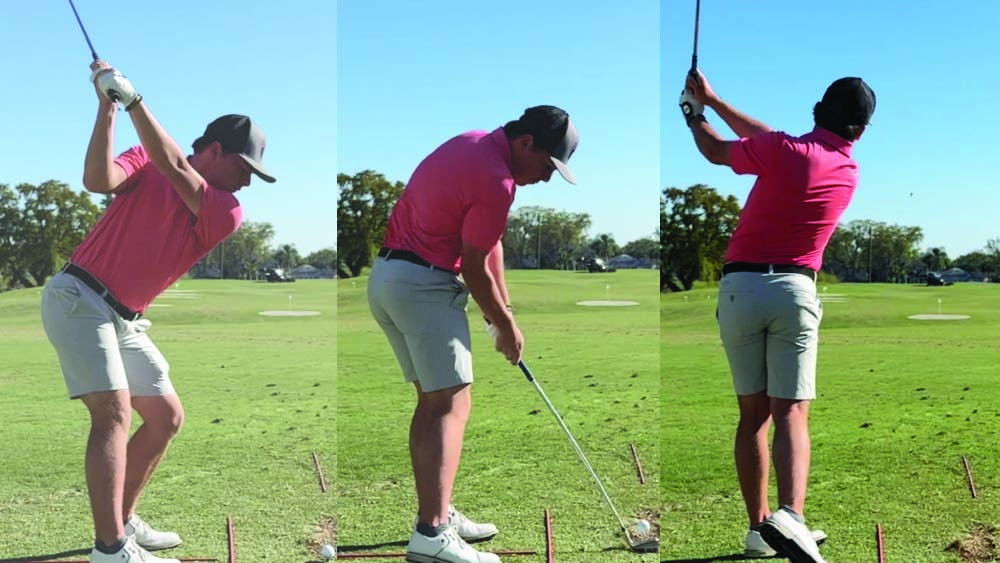
Why analyze swings on video
Do you ever feel like you’re giving a student the same note every lesson? Often the problem isn’t the advice. It’s that the student can’t feel what they’re doing wrong, and you can’t always see it at full speed either.
Video fixes both sides of that. You can slow the swing down and draw right on the frame that matters. Your student sees exactly what you see.
This guide walks through how to analyze a golf swing on video the way a coach would. We’ll start with camera setup, then move through the swing one checkpoint at a time. At each one, we’ll cover what good looks like and the faults that tend to show up.
Set up your camera angles first
Good analysis starts before the student swings. If the camera is in a different spot every lesson, you can’t compare one week to the next. Lines you draw won’t mean much either.
Most coaches film from two angles.
Down the line. Set the camera behind the golfer, looking straight down the target line. Put it at about hand height, in line with the hands at address. This view is best for checking swing plane and club path.
Face on. Set the camera directly in front of the golfer, square to them. Center it on the chest or belt buckle. This view is best for checking weight shift and head movement.
A few habits make the footage easier to work with:
- Use a tripod. Handheld video wobbles, and the lines you draw will drift.
- Film in slow motion if your phone allows it. 120 or 240 frames per second makes impact much easier to see.
- Mark your tripod spot on the range or bay with tape. Then every lesson is filmed the same way.
- Keep the whole golfer and club in frame from address to finish.
Start with address
Most swing faults start before the club moves. That’s why address is the first frame to pause on. It’s also the easiest to fix, because the student isn’t moving yet.

Posture
From down the line, look at the spine angle and how far the golfer bends from the hips. Watch for a rounded upper back or knees that are locked or bent too much. A line drawn along the spine here becomes your reference for the rest of the swing. We can learn from Will Zalatoris, who adjusted his posture to alleviate back pain and achieve a more sustainable swing.

Grip
Often overlooked, grip sets the tone for the entire swing. Martin Chuck’s mantra, “get your good hands on the club,” perfectly captures this concept. Use pinch zoom to make it easy to see what your student is doing the moment of takeaway. Check how many knuckles show on the lead hand and where the V’s between thumb and finger point. For example, your student may have the “perfect grip” on the club that Scottie Scheffler has, but a millisecond before takeaway they revert back to old habits.

Alignment
From down the line, draw a line along the target line. Then check whether the feet and shoulders sit parallel to it. Shoulders that are open while the feet look square is a common miss.
Ball Position
From face on, check where the ball sits between the feet for the club being hit. It should move forward in the stance as the club gets longer.Understanding the sequence of feet, shoulders aligned to the target, and delivery of the club to the target line is mission critical to a consistent golf swing.
None of these need slow motion. A single paused frame is enough, and it’s a good habit to save that frame so you can compare it next lesson.
Watch the takeaway closely
The first couple of feet of the backswing set up a lot of what follows. It’s also where old habits sneak back in.
Here’s a common example. Your student sets a great grip at address, the one you’ve been working on for weeks. Then, a split second before the club moves, their hands shift back to the old grip. At full speed you’d never catch it. Slowed down and zoomed in on the hands, it’s obvious.
From down the line, check that the arms and shoulders start the club back together. Watch for the club getting whipped inside early, or lifted straight up with the arms. A line along the shaft at address helps you see whether the club stays on plane as it moves away.
From face on, look for a head that slides away from the target or a big sway of the hips. Both make it hard to get back to the ball consistently.
The top of the backswing and the transition
Pause the video at the top. This is a good frame for comparing a student to their own past swings, because it’s easy to find the same moment every time.
From down the line, look at the club shaft. Is it roughly parallel to the target line, pointing left of it (laid off), or pointing right of it (across the line)? Then check the spine. Draw a line along it and compare it to the line you drew at address. If the angle has changed a lot, the golfer has stood up or dipped during the backswing.
From face on, check how much the shoulders have turned and where the weight has gone. Ideally the golfer has loaded into the trail side without swaying past the trail foot.
The transition is the first move down from the top, and it happens fast. This is where slow motion earns its keep. Step through it frame by frame and watch what starts the downswing. In good swings the lower body usually leads. When the arms and shoulders fire first, the club tends to come over the top.
Impact and the finish
Impact lasts a fraction of a second, so this is the checkpoint you can’t coach without slow motion. Step frame by frame until the club meets the ball.
From face on, look at the hands and the shaft. In most good iron swings the hands are slightly ahead of the ball and the shaft leans toward the target. If the clubhead has passed the hands, the golfer is likely flipping or scooping at the ball. Check the head too. It should be close to where it was at address.
From down the line, look at the hips. They should be open to the target at impact. Compare the spine line to your address line again. A golfer who stands up through impact (early extension) will show the hips moving toward the ball and the spine angle rising.
The finish tells you how the rest of the swing went. A balanced finish with the weight on the lead side usually means the sequence worked. If the student is falling back or stepping off to save their balance, rewind and look for where it started.
Marking up the video with lines and angles
Seeing a fault is half the job. The other half is getting your student to see it. Drawing on the video does that better than any explanation.
These are the markups coaches use most:
- Spine line. Drawn along the spine at address. Leave it on the screen and play the swing. Any rise or dip jumps out.
- Shaft plane line. Drawn along the club shaft at address, from down the line. It shows whether the club stays on plane going back and coming down.
- Head box. A box around the head at address. If the head drifts out of the box, the student can see exactly when.
- Angles. Measure spine tilt or lead arm angle at a key frame. A number gives you something to track week to week.
Two more habits make markups more useful. First, compare the student’s swing next to an earlier swing of their own, filmed from the same spot. Progress is easier to believe when they can see it. Second, keep your markups simple. One or two lines on a frame teach more than six.
An app built for this makes the whole process faster. Onform’s golf swing analysis app gives you all of these drawing tools, plus pinch zoom for close looks at the hands. Skeleton tracking adds a joint overlay to the video, and club head tracking now works on down-the-line video. You can mark up a swing on your phone during the lesson and send it to your student before they leave the range.
When to go beyond 2D video
Regular video covers most of what you’ll coach day to day. But 2D video only shows the swing from one angle at a time, and some faults are about timing more than position.
That’s where 3D data helps. It can show the order in which the hips, torso, arms and club speed up and slow down, known as the kinematic sequence. If a student’s swing looks fine on video but still lacks speed, the sequence is often where the answer is. Our beginner’s guide to the kinematic sequence explains how to read it.
Onform’s markerless 3D tracking works from regular video, with no sensors or suits, and is available on the Coach Pro plan. Pressure mat data from the SensorEdge Dynamix Duo can also sit alongside your video, so you can see how the golfer’s weight moves at each checkpoint above.
Frequently asked questions
Is there an app that will analyze a golf swing?
Yes, and they fall into two groups. Some are built for golfers working on their own, often with automatic AI feedback. Others, like Onform, are built for coaches. A coaching app is built around how you teach, so you can mark up a swing during the lesson and track each student’s progress over time.
Can ChatGPT analyze a golf swing?
General AI chat tools can describe what they see in a photo or clip and give broad tips. They can’t reliably measure angles from video, and they don’t know your student’s history. Think of them as a second opinion, not a replacement for a coach looking at the frame.
What’s the best camera angle for golf swing analysis?
Use both down the line and face on if you can. Down the line shows swing plane and club path. Face on shows weight shift and head movement. Keep the camera in the same spot every lesson so you can compare swings.
What frame rate should I use to film a golf swing?
Use slow motion at 120 or 240 frames per second if your phone supports it. Standard video is fine for address and the top of the backswing. You’ll want slow motion for transition and impact.
Start analyzing swings on video
You don’t need a studio to do this well. A phone on a tripod and a consistent setup will get you most of the way. The checkpoints above give you a repeatable way to look at every swing.
If you want to see how Onform fits into your lessons, schedule a demo with our team. Or download the app and try it free.
You explain that he starts with body first but justin rose says he brings the club down keeping back towards target while he’s doing that is this feeling.
Pingback: What Should You Expect in a Custom Club Fitting In Tulsa, Oklahoma - Tour Quality Golf | Indoor Golf, Lessons, Fittings & Virtual Golf
Pingback: Beef Up Your Next Golf Game with Custom Club Fitting In Tulsa, Oklahoma - Tour Quality Golf | Indoor Golf, Lessons, Fittings & Virtual Golf